Is your gas oven looking dirty, but you don’t have a self-cleaning feature to make the job easy? Cleaning a gas oven without that handy function can feel like a big chore.
But what if you knew simple steps that make the process faster and less messy? In this guide, you’ll discover easy ways to get your oven sparkling clean without harsh chemicals or expensive tools. Ready to take control and bring your oven back to life?
Keep reading, and you’ll find out exactly how to do it.
Prepare The Oven For Cleaning
Cleaning a gas oven that is not self-cleaning needs careful preparation. You must get the oven ready before scrubbing and wiping.
This makes the process safer and easier. Follow simple steps to prepare your oven well.
Turn Off Gas And Power
Always turn off the gas supply before cleaning the oven. This prevents gas leaks and accidents.
Also, switch off the oven’s power from the main switch or unplug it. This stops electrical hazards during cleaning.
Remove Oven Racks And Accessories
Take out all racks, trays, and other accessories from the oven. Cleaning these separately is easier and more thorough.
Use warm soapy water and a sponge to clean the racks. Let them soak if there is tough grime.
Ventilate The Area
Open windows and doors to let fresh air in. Cleaning products and oven fumes can cause irritation.
Use a fan if you have one. Good airflow helps keep the air safe and comfortable while you clean.
Credit: www.happysappliances.com
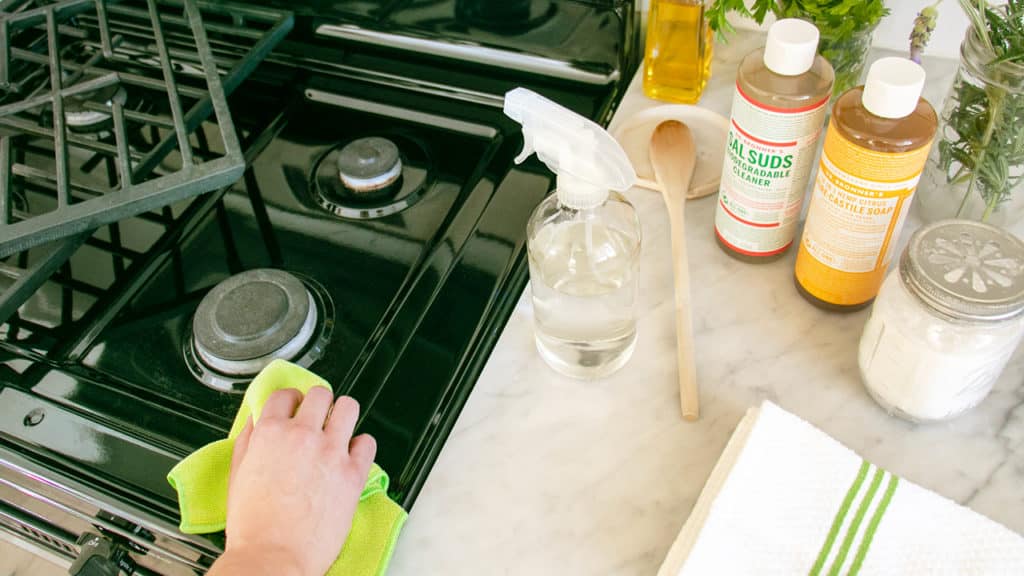
Gather Cleaning Supplies
Cleaning a gas oven that is not self-cleaning needs the right supplies. Gathering these before you start makes the job easier.
Using safe and effective products protects your oven and your health. You also need the right tools to reach all parts of the oven.
Choose Safe Cleaning Agents
Pick cleaning agents that are safe for gas ovens and non-toxic. Avoid harsh chemicals that can damage the oven or leave harmful fumes.
Natural cleaners work well and reduce risk. Baking soda and vinegar are good options for scrubbing and deodorizing.
- Baking soda: gentle abrasive for scrubbing
- White vinegar: cuts grease and disinfects
- Dish soap: removes light grease and dirt
- Water: to rinse and dilute cleaners
- Non-toxic commercial oven cleaner (optional)
Assemble Tools Needed
Gather tools that help you clean hard-to-reach places inside the oven. Having the right tools saves time and effort.
Use soft and sturdy tools to avoid scratching the oven’s surface or parts.
- Rubber gloves: protect your hands
- Soft cloths or sponges: for wiping surfaces
- Scrub brush or old toothbrush: for scrubbing corners
- Plastic or silicone scraper: to remove stuck-on food
- Spray bottle: to apply vinegar or water
- Bucket or bowl: for mixing cleaning solutions
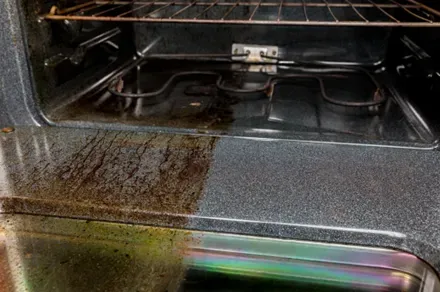
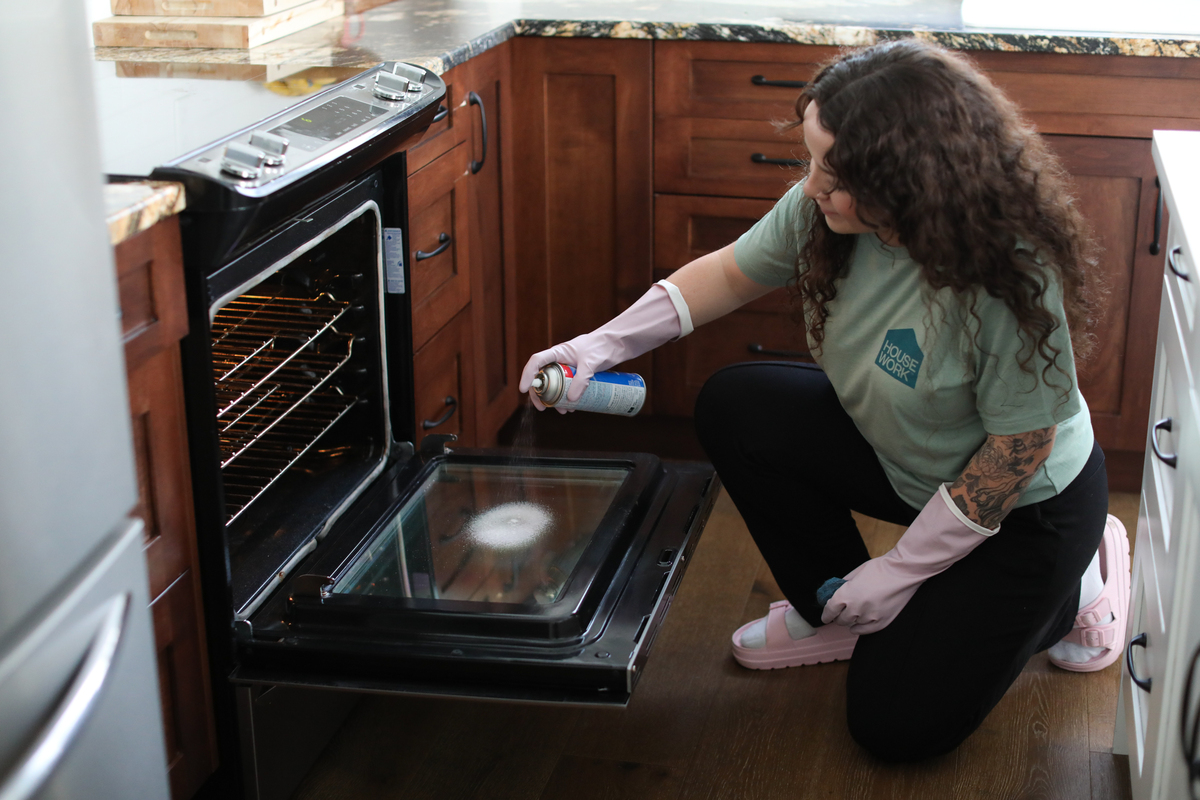
Clean Oven Interior
Cleaning a gas oven that is not self-cleaning can be simple. You need to focus on the oven’s interior to remove dirt and grease.
Using the right tools and steps will make the cleaning safe and effective. Let’s look at how to clean the oven’s inside.
Apply Cleaning Solution
First, prepare a cleaning solution. You can mix baking soda and water to make a paste. Spread the paste inside the oven, covering all dirty areas.
Let the solution sit for at least 20 minutes. This helps loosen the grease and food stains inside the oven.
Scrub Stubborn Stains
Use a sponge or a soft brush to scrub the oven interior. Focus on areas with tough stains or burnt food.
- Apply more cleaning paste if needed
- Scrub gently to avoid scratching the oven surface
- Use a plastic scraper for hard spots
Wipe Down With Damp Cloth
After scrubbing, wipe the oven with a damp cloth. This removes the cleaning paste and loosened dirt.
Repeat wiping until the oven is clean and no residue remains. Dry the interior with a clean towel before using the oven.
Credit: www.housework.com
Clean Oven Racks And Accessories
Cleaning oven racks and accessories is important to keep your oven working well. Dirt and grease can build up over time.
Cleaning these parts makes cooking safer and helps your food taste better.
Soak Racks In Warm Soapy Water
First, remove the racks from the oven carefully. Place them in a large container or sink.
Fill the container with warm water and add some dish soap. Let the racks soak for at least 30 minutes.
- Use warm water to help loosen grease
- Soaking softens burnt food and grime
- Longer soaking works better for heavy dirt
Scrub And Rinse Thoroughly
After soaking, use a scrub brush or sponge to clean the racks. Focus on removing all stuck food and grease.
Rinse the racks well with clean water to remove soap and dirt. Dry them completely before putting them back.
- Use a stiff brush for tough spots
- Rinse with warm water to clear soap
- Dry with a towel or air dry fully
Address Oven Door And Window
Cleaning a gas oven door and window keeps your oven looking good. It also helps you see inside while cooking.
Oven doors can get greasy and dirty. Cleaning them carefully improves oven performance and safety.
Remove And Clean Door Glass
First, check if your oven door glass can be removed. Some models allow easy removal for cleaning.
Use warm water and mild soap to clean the glass. Avoid harsh chemicals that can damage the glass or seals.
- Turn off the oven and wait for it to cool.
- Open the door fully and find screws or clips holding the glass.
- Carefully remove the glass panel and place it on a soft surface.
- Wash with warm soapy water and a soft cloth.
- Rinse with clean water and dry with a lint-free cloth.
- Replace the glass securely before using the oven.
Wipe Door Seals And Frame
Door seals keep heat inside the oven. Dirt and grease can reduce their effectiveness.
Use a damp cloth with mild soap to wipe the seals and door frame. Avoid soaking the seals with water.
- Turn off the oven and let it cool down.
- Use a soft cloth dampened with warm, soapy water.
- Gently wipe the rubber or silicone seals along the door edges.
- Clean the door frame to remove grease and food particles.
- Dry the seals and frame with a clean cloth.
- Check for cracks or damage and replace seals if needed.
Final Steps
After cleaning your gas oven, it is important to finish the process carefully. These final steps help keep your oven safe and working well.
Take your time to dry, put back all parts, and test the oven. This will ensure everything is clean and ready to use.
Dry All Components
Make sure all parts of the oven are completely dry before putting them back. Moisture can cause problems with the oven’s function.
Use a clean cloth or let the parts air dry in a warm place. Check corners and small spaces where water might hide.
Reassemble Oven Parts
Put all the oven parts back where they belong. Follow the order you took them off to avoid mistakes.
- Replace racks carefully
- Attach drip pans and trays
- Secure any screws or clips
- Check that the door closes properly
Make sure everything fits well and is stable before moving on.
Test Oven Functionality
Turn on the oven to check if it works correctly. Set it to a low temperature first.
Watch for any strange smells, noises, or errors. These signs may mean a part is not working right or is still wet.
- Preheat oven to 200°F (93°C)
- Wait 10 minutes and observe
- Check for normal heating and no gas smell
- Turn off oven and let it cool
Prevent Future Build-up
Cleaning a gas oven that is not self-cleaning can be tough. Stubborn stains and grease build-up make it harder each time. Preventing future build-up helps keep your oven clean longer.
Simple habits and tools can stop dirt from sticking inside your oven. This saves time and effort when cleaning.
Regular Maintenance Tips
Wipe spills as soon as your oven cools down. This stops food from hardening and turning into grease. Check for crumbs and clean them often. Keep the oven door open after cooking to air it out.
- Clean small spills immediately
- Remove crumbs regularly
- Air out the oven after use
- Use a damp cloth for quick wipes
Use Oven Liners And Covers
Oven liners catch spills and crumbs. They protect the oven floor from grease and burnt food. You can remove and clean liners easily. Some liners are heat resistant and safe for gas ovens.
Cover dishes with lids or foil to stop splatters. This keeps the oven cleaner and stops food from sticking to the walls.
- Place heat-safe liners on the oven floor
- Remove and wash liners regularly
- Cover food with lids or foil during cooking
- Avoid plastic covers inside the oven

Credit: www.angi.com
Frequently Asked Questions
How Do I Clean A Gas Oven Manually?
To clean a gas oven manually, remove the racks and soak them in soapy water. Make a paste of baking soda and water, apply it inside the oven, and let it sit overnight. Wipe off with a damp cloth and rinse thoroughly.
What Tools Are Needed For Cleaning A Gas Oven?
You need baking soda, vinegar, a spray bottle, a sponge, and a scrub brush. A microfiber cloth and rubber gloves are also useful. These tools help remove grease and grime without damaging the oven.
Can I Use Vinegar To Clean My Gas Oven?
Yes, vinegar is effective for cleaning a gas oven. Combine vinegar and water in a spray bottle. Spray the mixture on greasy areas, let it sit for a few minutes, then wipe clean. Vinegar helps dissolve grease and neutralizes odors.
How Often Should I Clean My Gas Oven?
Clean your gas oven every three to six months. Regular cleaning prevents grease buildup and maintains efficient performance. If you use your oven frequently, consider cleaning it more often to ensure optimal functionality and hygiene.
Conclusion
Cleaning a gas oven without self-cleaning takes time and care. Use simple tools and safe cleaners for best results. Regular cleaning keeps your oven working well and smelling fresh. Avoid harsh chemicals to protect your oven parts. Small, steady steps make the job easier and less messy.
A clean oven means better cooking and less smoke. Keep your kitchen safe and your meals tasty. Try these tips next time your oven needs a good clean.